Organizing all of the collaborators on a photoshoot to be at the right location at the right times with the right schedule in hand can be a large task. This is why creating a call sheet can be just as valuable as a photography storyboard or shot list when preparing for a photoshoot.
To guide you through the process step-by-step, we'll be demonstrating with StudioBinder’s call sheet software . That being said, the principles outlined here are applicable universally—whether you opt for software or prefer the traditional method of using pen and paper.
Steps in this guide
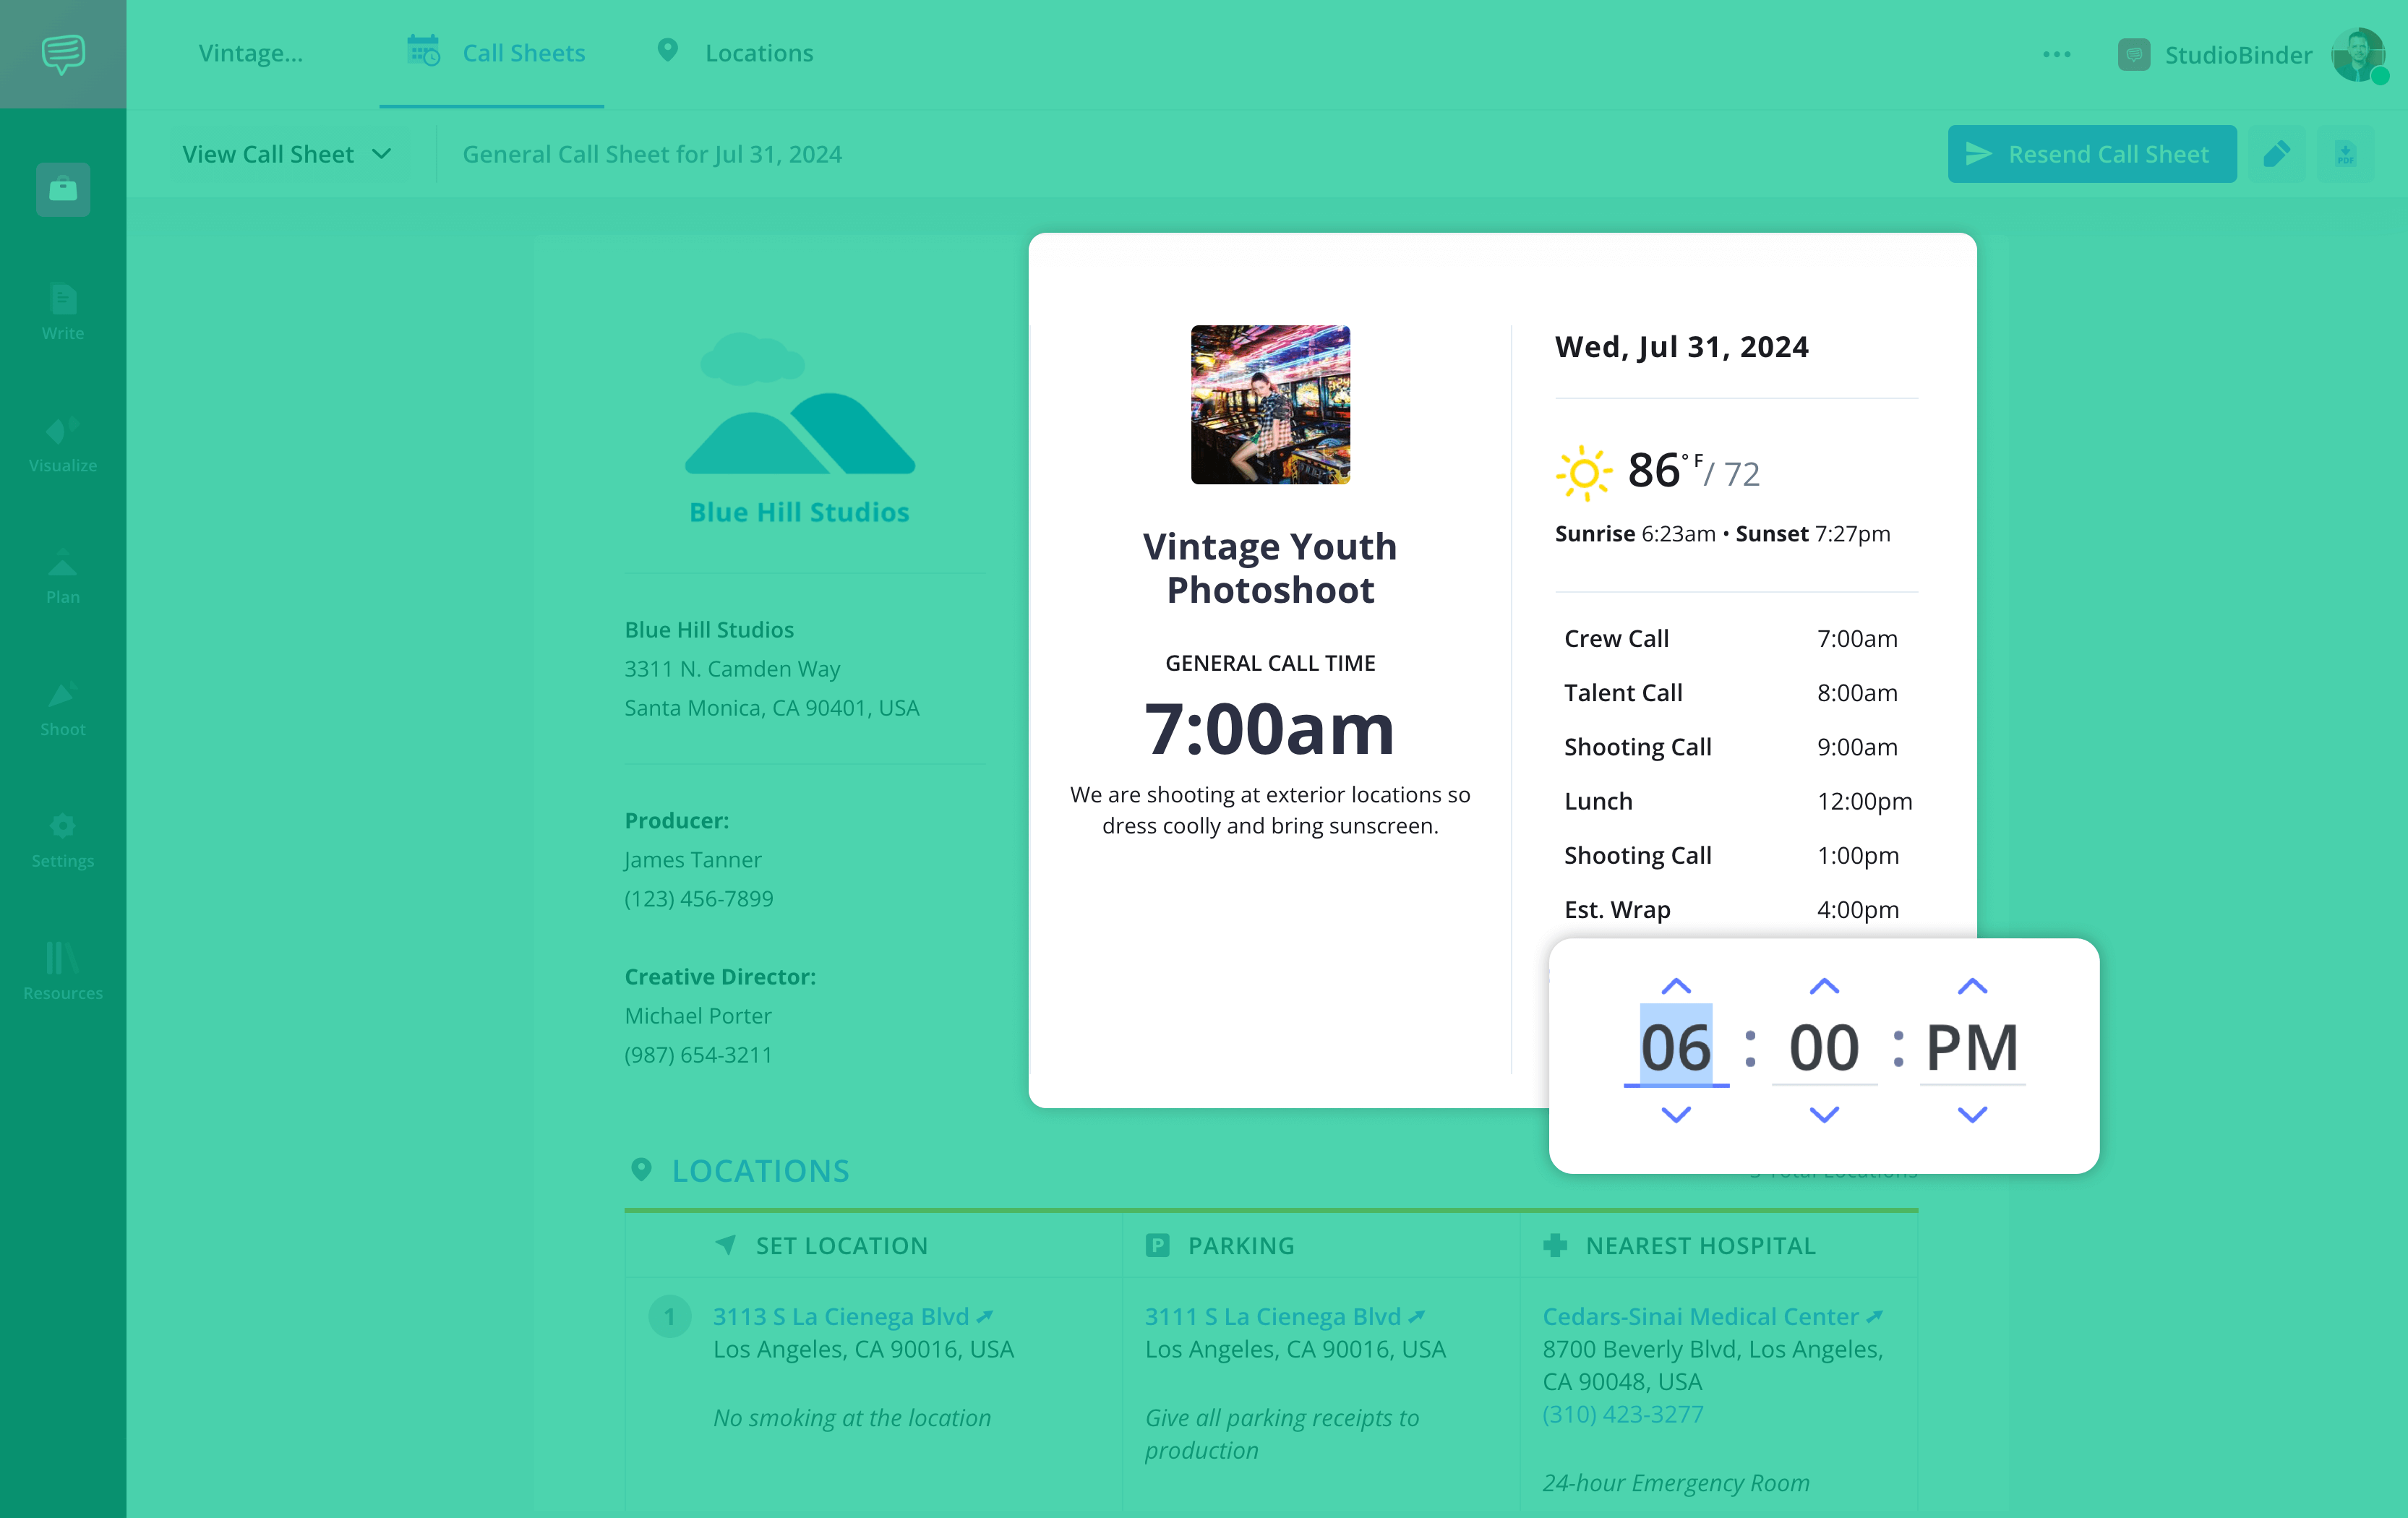
The top portion of a call sheet should feature essential production details, such as the title of the photoshoot or campaign, the studio and/or photographer’s name, and contact information for key personnel like assistant photographers, production assistants, models, or make up artists.
Next, the middle of your call sheet or side column will need to include details specific to the photoshoot day. Photoshoot day details in a call sheet should cover:
For a photoshoot, the shoot location is crucial info for crew and talent. In this section, location details include:

Next comes the photoshoot schedule for that particular day. This includes:
While optional, providing an additional schedule for the following day—containing the same details—gives the talent and crew a helpful heads-up and is always appreciated, especially on bigger photoshoots.